Pandora Bracelet

I decided to make my own Pandora bracelet with supplies from Etsy.  I ordered the bracelet, a few select charms, and a few filler beads for my 23rd birthday. I love the idea of having the charms without having so many pieces hanging off to catch on things. It's also not so delicate--- it makes quite a statement!  While it probably clocked in at $100.00.... considering a bead or a bracelet costs $50.00 in stores... I think it's quite a bargain!

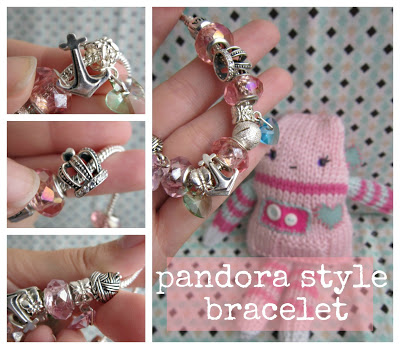
Each of the charms has meaning:

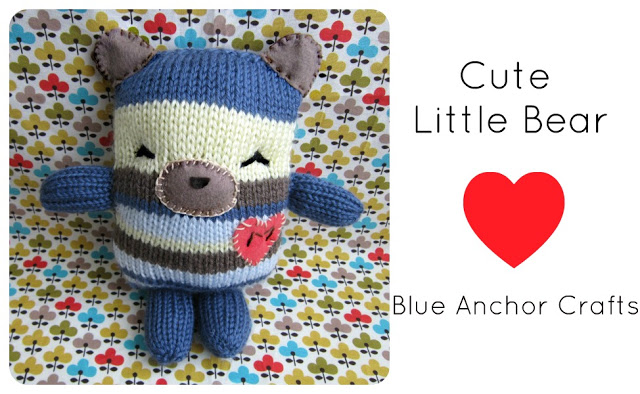
Anchor: Blue Anchor Crafts and where I live.

Crown: Represents my history degree, which was largely British History based

Yarn Ball: My love of knitting and my dollies

Soon I'm getting a little medical charm to represent my graduation from my Medical Office Assistant course... for eight dollars!

The peachy pink crystal-ish beads are gorgeous. They're such a pretty colour. I bought a little bag of coloured crystal hearts which are a little dangley and add a pop of colour. I'm going to go down to my local bead shop and see if I can find a few lamp-work beads to add! 

I highly recommend finding a bracelet on Etsy and filling up a few beads for yourself or a loved one. It's so fun to search for all the different charms in all the different categories!

Bears and Robots - Oh my!

Hello Everyone!

I've been a little knitting obsessed the last few days. I can't seem to ever have a balanced life--- I get excited about something and out goes everything else!

I made two different types of softies this week-- a bear and a robot!

This little bear is for my little 'nephew' (I'm an only child, so I count my cousin's kids as my niece and nephew). The little guy is turning 1! He doesn't live here, so I've never had a chance to meet him-- so I decided to be the fun 'Auntie' that sends him cards and makes him things.

I love this little bear... He has such a cute little expression and I'm so happy with how the colours came out! When you're sitting on your couch with a dozen balls of yarn in your lap-- it can be a daunting task! Here he is!

This little lady is my newest creation! She's Kamiko the Robot! I have a weird love of Japanese names... and the Japanese are much more advanced technologically... and make everything cute: hence Kamiko. (^_^) The name Kamiko also means "Superior Child"... and the nerd in me thought that was fun. She's only for children +3 with her safety eyes, and maybe even older with the buttons. I can always embroider eyes and use felt for buttons if the order is for a small child.

So, that's what I've been up to lately. I'm using knitting to blow off steam from the extremely frustrating class at Sprott Shaw right now. The material is all to do with business (I'm an MOA-- remind me why I need to take this?) and the multiple choice tests usually have two answers that are equally right. *happy place*

Hope everyone has a great weekend! Did you have productive weeks? If you're in Victoria, be sure to check out the Oak Bay Tea Party and watch the fireworks tonight!!

Tiny Kitchen

Pretty cute, huh? 

Last week my mum had the idea to make a toy stove/kitchen for my little 'niece'. We're having a Christmas party and we thought it would be fun for her to have something to play with while she was over. We got a Uhaul box, a few supplies from the dollar store and around the house, and created this little kitchenette! Isn't it sweet?

List of supplies:

  • Uhaul Box
  • Metal dish (we used a dog dish)
  • Small paper plates
  • Furniture carpet protectors (for the knobs)
  • Wrapping paper
  • Duct tape
  • Tin foil
  • Paper towel roll
  • Screws/nuts
  • Paper for print outs (could use child's name)
  • Soap Dish
  • Scrubber
  • String (braided)
  • Fabric Scrap

How we did it:

We put the Uhaul box so the top was standing up (not folded down) so it was taller, then scored one of the edges and reenforced the back of the stove. We then cut a hole for the 'sink' by tracing the dish. We covered the box in retro light pink paper, then cut out aluminum foil to create the 'oven' door. We duct taped around the edges to add some strength and contrast.

I then made the tap from the paper roll from the wrapping paper. I cut it, bent it, then wrapped it in duct tape until it looked like a tap. We stapled the 'faucet', then covered the area in duct tape. We used an awl to make a hole in the side, and I braided twine to act as a tea-towel holder. We screwed the carpet protectors to the back of the stove--- making turn-able knobs. We cut down the black paper plates a little, and used carpet tape to stick them down. We printed out a clock and I created a logo for the stove and stuck it on with double sided scrapbook squares. We sewed a scrap of seafoam fabric to look like a dish towel, then stuck on a soap dish.

I'm unbelievably excited about how it turned out (much unlike the ill-fated Gingerbread houses). It was extremely easy to make and only took an afternoon. I'm excited for the Christmas Party now--- I hope she loves it! 

Hope you enjoyed this DIY!

Update: She loved it so much that I took it over to her house! It was a major hit!

Ginger - Fail

I laugh now looking at the ambitiousness of my last post. I am not a baker. Food and I maintain a casual relationship-- I eat it, can sort of cook it, but the finesse of baking and decorating alludes me. Give me glue, paper, a pencil or yarn and I'll make something lovely--- as long as its not edible. I have decided that just because Martha Stewart's EXPERTS create gorgeous examples- does not mean that I am qualified to do it-- case in point: the gingerbread house(s).

It was doomed to fail:

  • There were no chocolate flavoured graham crackers in two grocery stores (supposed to look tudor-y)
  • The graham crackers she did use were not square. This helps with construction (ie- leaves huge gaping holes in the sides of the house.)
  • The caramel glue recipe didn't work. I had to boil sugar, then add water (DO NOT DO THIS--- IT EXPLODES!--- duh.)
  • Graham crackers are HORRIBLE to cut. They shatter easily and crumbs get everywhere.
  • Caramel glue is INTENSELY sticky- yet manages to not hold the house together well.

All in all, after smashing half the graham crackers, getting caramel EVERYWHERE, dropping whole graham crackers into the pot, burning myself, and making three ugly houses--- I ended up with one.(I quickly abandoned the multi-layered extravagant design). One imploded, the other exploded while I iced the sole survivor. The effort to make this house coloured its success-- but a day later (now the caramel is removed from my fingernails)-- it looks kinda homey and cute.

Messiest thing ever.

Frustration. (Note gaping hole in side of house)

Finished product--- all alone. I like it's shake roof and tudor-ish styling. It kind of looks like a Black Forest Cake. <3 So not attempting this again though. I'm definitely not opposed to the kit.

Thanks for reading!